Setting Up Local LLMs on macOS
Written on
In this post, I’ll go over how to set up local LLMs on macOS, though the same steps should also work on Windows if using Windows Subsystem for Linux (WSL). More on that in the next blog post, which will be about setting up Windows 11 for development!
There are some reasons why it might be nice to have local LLMs on your computer, and one reason is that it is completely yours. Cloud-based LLMs like ChatGPT, Gemini, Grok, etc, tend to be very limiting because you are subject to the company’s policies on what you can and can’t do with it. It also offers complete privacy, the ability to access it offline, and no billing or usage limitations.
That said, local LLMs aren’t as advanced as frontier models on cloud-based LLMs, and has a restrictive hardware requirements, especially needing large storage, high RAM, and GPUs (or graphics cards) with a large video memory (VRAM), and in recent years, these are starting to become expensive due to the AI boom.
So there are trade-offs, but if you have a machine that is capable of running LLMs locally, then the pros outweigh the cons.

We’ll use Ollama, which is a free and open-source program that allows you to download large language models (LLMs) onto your computer. There are other programs, such as LM Studio, if you prefer having a GUI, but Ollama is lightweight, CLI-based, and offers seamless REST API integration.
To begin, install it through Homebrew:
brew install ollama
Once that is installed, run the command below to start up an instance of the local Ollama server, hosted locally on http://localhost:11434 (you can verify it with curl http://localhost:11434)
ollama serve
If it’s the first time running that command, it will create both the private id_ed25519 SSH key and id_ed25519.pub in the ~/.ollama directory. You should also see cache and models (which is where the models you download will reside).
This instance will only be active in the current Terminal session where you ran the command; therefore, you’ll need to open another Terminal window to run additional commands. To stop the instance, you will need to press Ctrl + C.
You can also run brew services start ollama to run it in the background, which allows you to use the same Terminal window, and can be stopped with brew services stop ollama.
The next step is to install the models, and this is highly dependent on the amount of unified memory, or RAM, your computer has.
To know what kind of model works best for your computer, I used this useful tool called whichllm, which can be run with uvx whichllm@latest (you need to have uv installed)
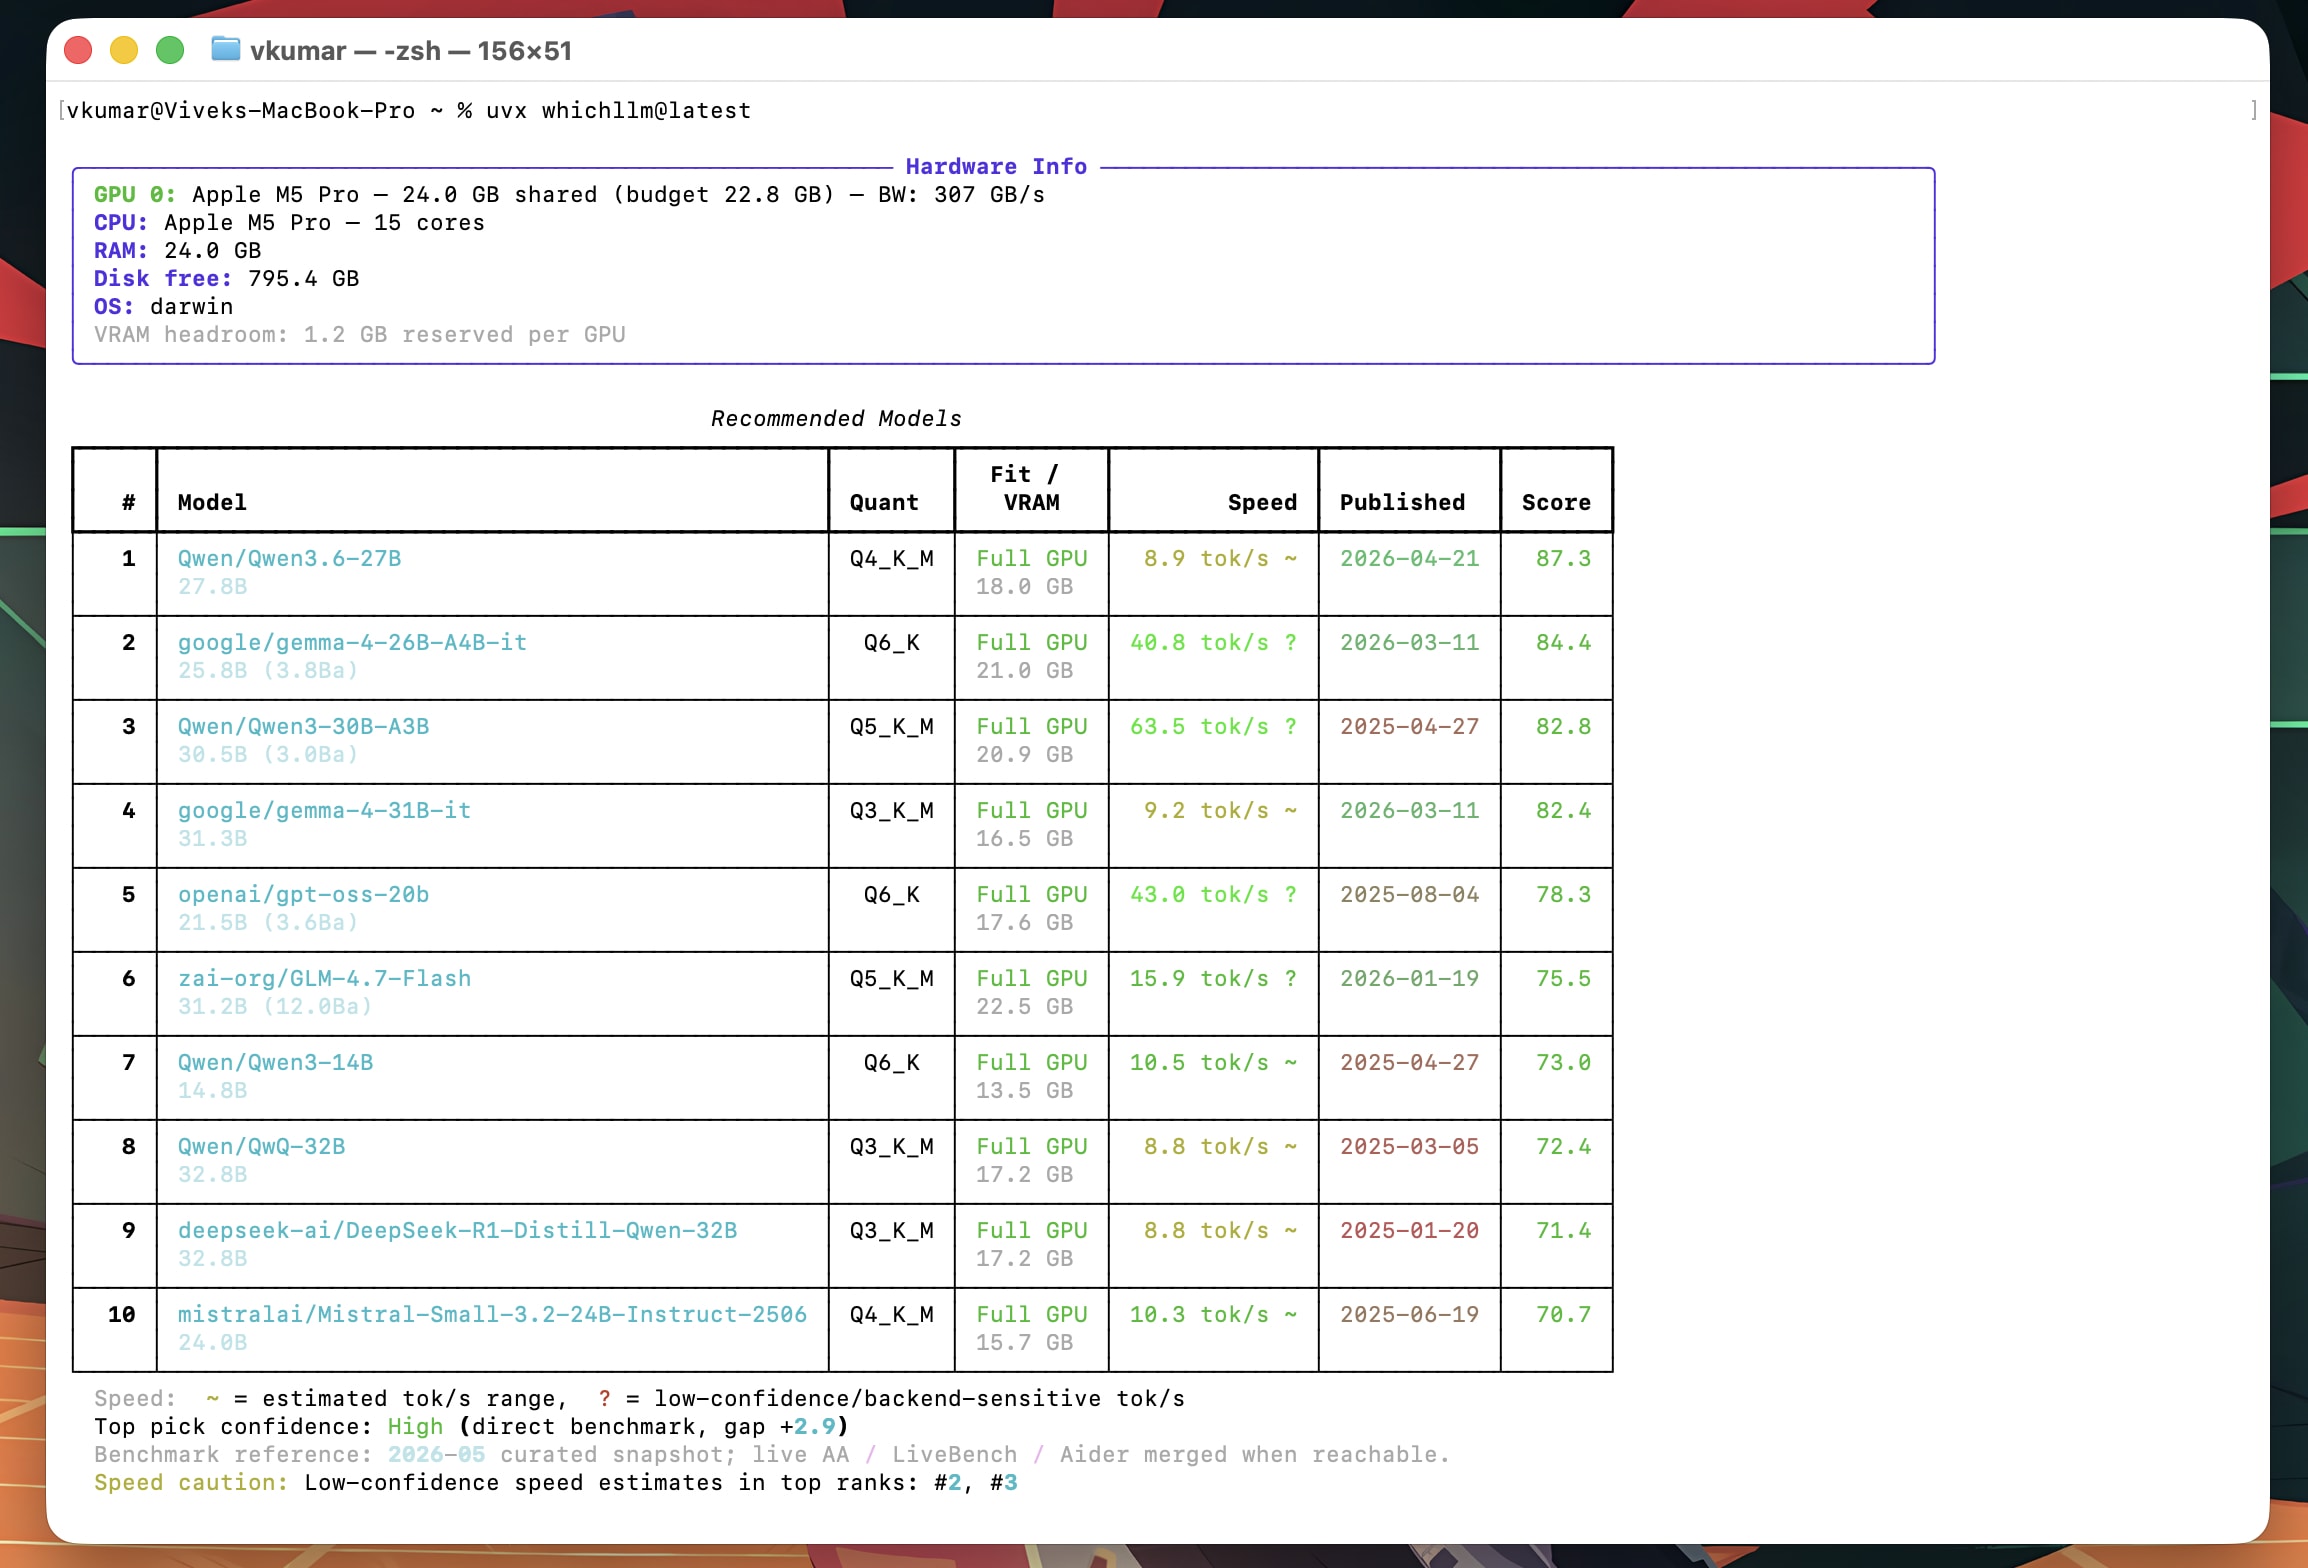
This tool tells you which models you can run based on your computer specifications and the estimate it reports. While it isn’t 100% accurate, it provides a good enough baseline to choose your models.
For this blog post, I installed a very light model called llama3.2:1b, which is a 1B model, so the installation should be pretty quick.
ollama run llama3.2:1b
When that’s done, it should give you the option to type your prompt in the Terminal. I tried a simple prompt: What is the answer to life, the universe, and everything? The model was able to answer that pretty fast, no doubt due to its very small size.
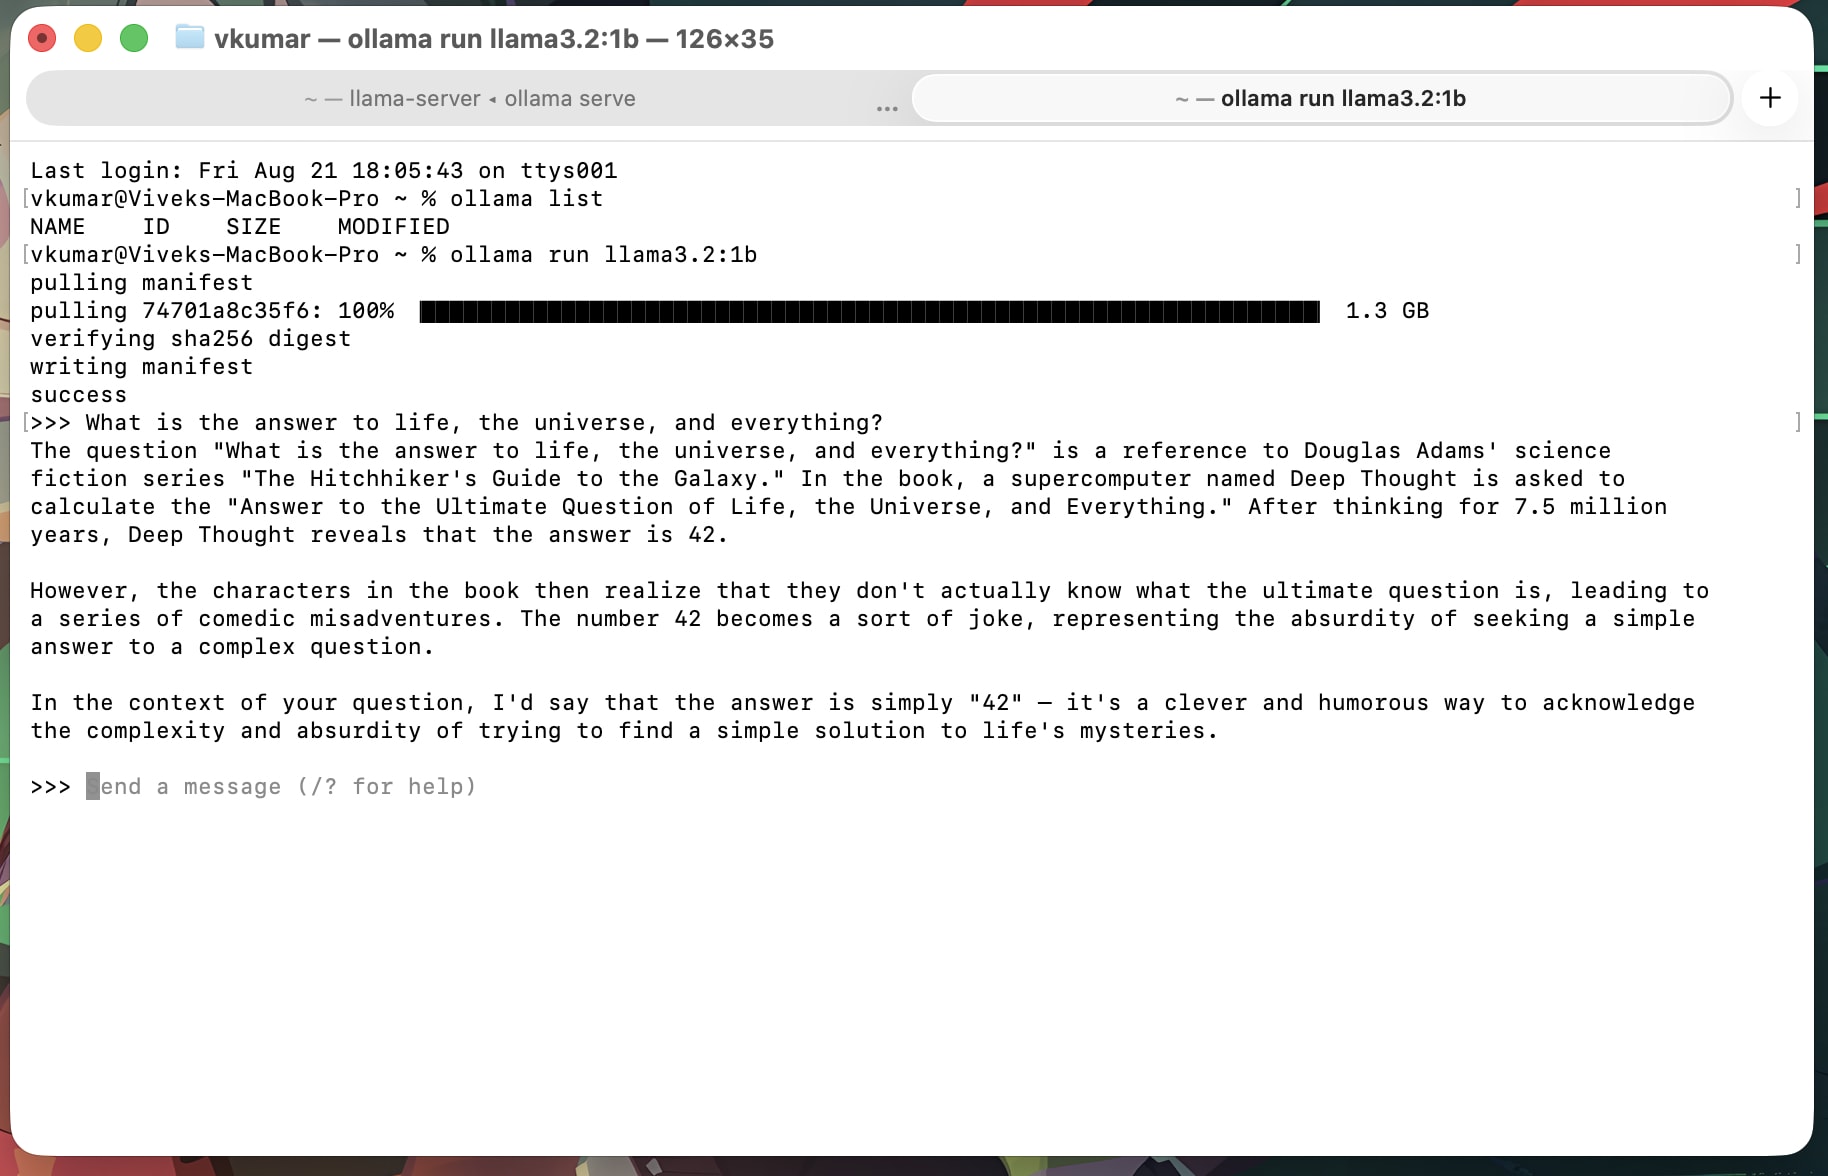
Finally, if you want to remove the model, you can use the command: ollama rm <model_name>. This will recover the space previously used by the model on the hard disk. You can use ollama list, which gives a list of all the LLMs currently installed on your computer.
In my case, the command would be the follow below.
ollama rm llama3.2:1b
I hope this blog post helps you out with setting up local LLMs on your laptop, and I do plan on doing some interesting stuff with them in the future! 😎